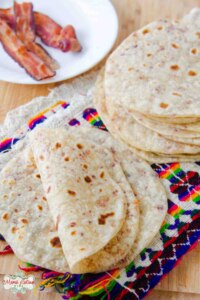
Bacon fat flour tortillas are soft and very tasty, plus they are an easy way to utilize leftover bacon drippings from breakfast or lunch. Learn how to make them with our step-by-step recipe.
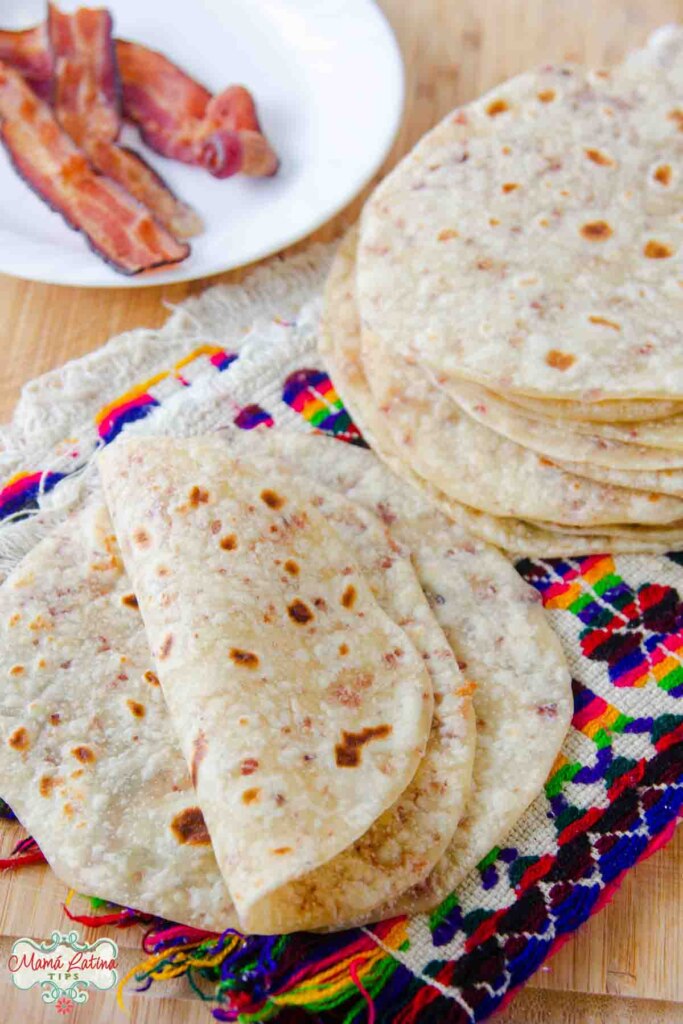
When it comes to homemade tortillas, we are always looking for new ways to add an extra touch of flavor and texture to them. And what better way than to incorporate the irresistible flavor of bacon?
Origin of the Recipe
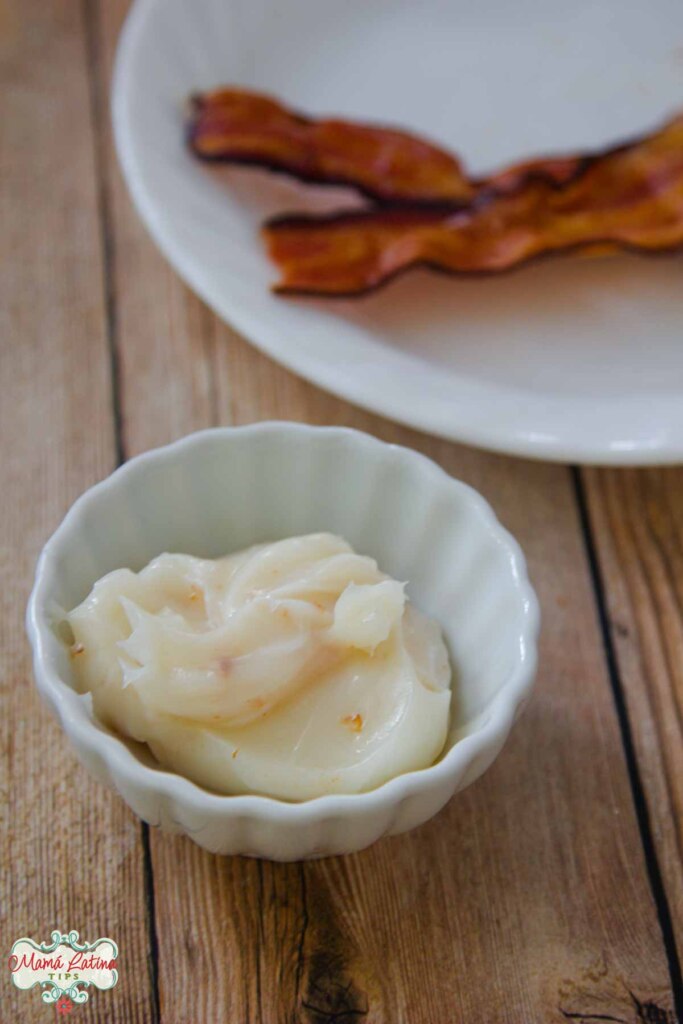
I don't like pouring bacon grease and oils down the drain, so I position two jars next to the stove when I cook. In one, I pour used vegetable oil and in the other, pork fat.
Then one day I wanted to make tortillas and didn't have lard in the house. I remembered that I had a jar of bacon grease in the fridge, so I used it and was delighted with the result.
On another day, I decided to add chopped bacon to the dough and have made them that way ever since. We like them so much that I actually used my recipe in the fourth episode (Movable Feasts) of my PBS show, The Great American Recipe, when I made BLT burritos. ¡Qué rico!
I hope you like them as much as we do.
Ingredients
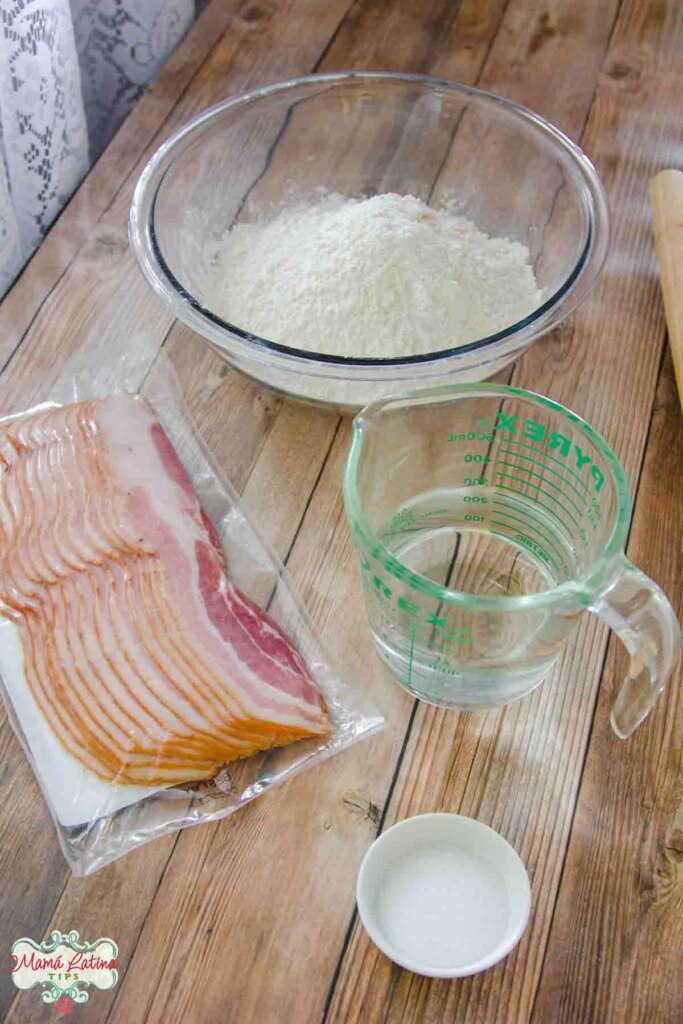
Wheat flour – I generally use “all-purpose” but sometimes I use bread flour. They both work really well.
Bacon – Both the leftover bacon fat and 3-4 chopped cooked slices to give the tortillas some texture and flavor.
Salt – You would think that bacon fat is salty enough, but it is not. The salt will bring out the smoky flavor of the fat. You can use table salt, sea salt or kosher salt.
Boiling Water – In my experience, boiling water creates a soft, pliable dough.
This post may contain affiliate links to Amazon and/or other stores, which we add to save you time looking for things you may need. If you use these links and make a purchase, we may earn a commission at no extra cost to you. For more information, please read our privacy policy.
About the Bacon Fat
For this recipe, you will need 60 grams of bacon fat, approximately ⅓ of a cup. Ideally, just like I did, you can use leftover bacon grease. However, if you do not have it, it’s easy to obtain it by frying a few slices of bacon.
For me, the easiest way to render the fat is by using my air fryer or oven, but you can also do it on a pan on the stove.
Storing Bacon Tortillas
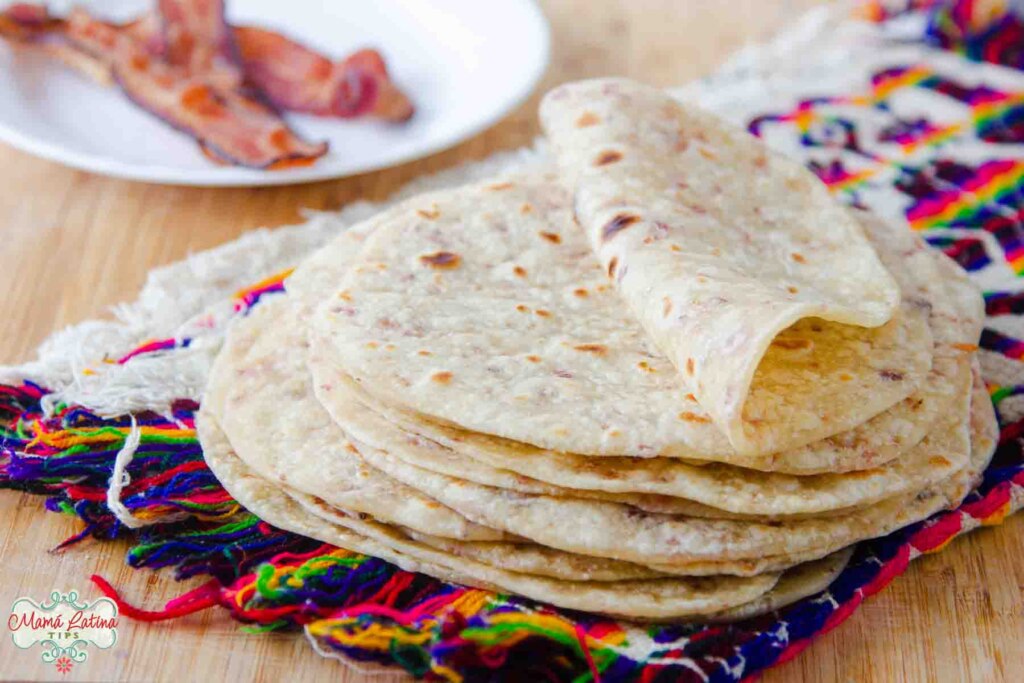
Ideally, we eat them freshly made when they are hot, but most likely, you will end up with leftovers. Since they do not have any preservatives, you should store them in the refrigerator.
Bring them to room temperature, wrap them in a kitchen towel, and put them in a plastic bag. I recommend the use of reusable plastic bags like these.
These tortillas can be frozen for up to three months. Cover them with plastic wrap, then put them in a silicone bag, like the ones I'm recommending above, if you have one. If not, use a double plastic bag.
How to Reheat Them
Reheating them is very easy. Just remove them from the fridge and heat them on a griddle or comal. My favorite is a cast iron comal, but a large skillet will also work.
If they are frozen, thaw them in the refrigerator for at least 5 hours, although moving them from the freezer to the refrigerator a day ahead is easiest.
How to Serve These Bacon Flour Tortillas
These tortillas are ideal for making burritos, quesadillas, or breakfast tacos. They are amazing when filled with meat or vegetables.
They perfectly accompany a meal like this chorizo and chickpea stew or this sirloin steak with poblano peppers. They're also delicious on their own.
Let's make them!
Flour Tortillas with Bacon
Ingredients
- 4 cups of all purpose flour (approx. 500 gm)
- ⅓ cup (60 gm) bacon fat*
- 1 teaspoon table salt, or 1 1/2 teaspoons of kosher salt
- 1 ¼ cup boiling water
- 3-4 slices of bacon, finely chopped
Utensils
- Large mixing bowl
- Kitchen scale or measuring cups
- Rolling pin, this is my favorite
- Cast-iron griddle or comal or a large skillet
- Tortillero or kitchen towel
Procedure
Prepare the Bacon
* If you don't have any bacon fat saved up, you'll need to fry a few bacon slices before you start. Depending on the package size you bought, you will need about 9-10 slices.
You will need 3-4 fried slices for this recipe, and with the ones you have left over, you can prepare this delicious recipe which I made on the show as well Chicken Salad with Bacon and Macadamias.
Chop the slices of bacon as finely as possible; by doing this, the flavor will be even throughout the dough and will also help you roll out the tortilla.
If the bacon pieces are too large, they could affect the tortilla's thickness or break it when you form it. Set aside.
Prepare the dough
In a large bowl, combine flour, bacon fat (either firm if you've been storing it or liquid if you've just fried the bacon), salt, and boiling water.
Stir with a wooden spoon first, remember that the water is very hot, until the bacon fat has either melted or integrated.
You can also use a stand mixer to make the dough if you have one. Please use the dough hook.
Add the chopped bacon, and with one hand, continue kneading until you get a slightly moist and elastic ball of dough that easily comes off your hand. This will take approximately 8 minutes.
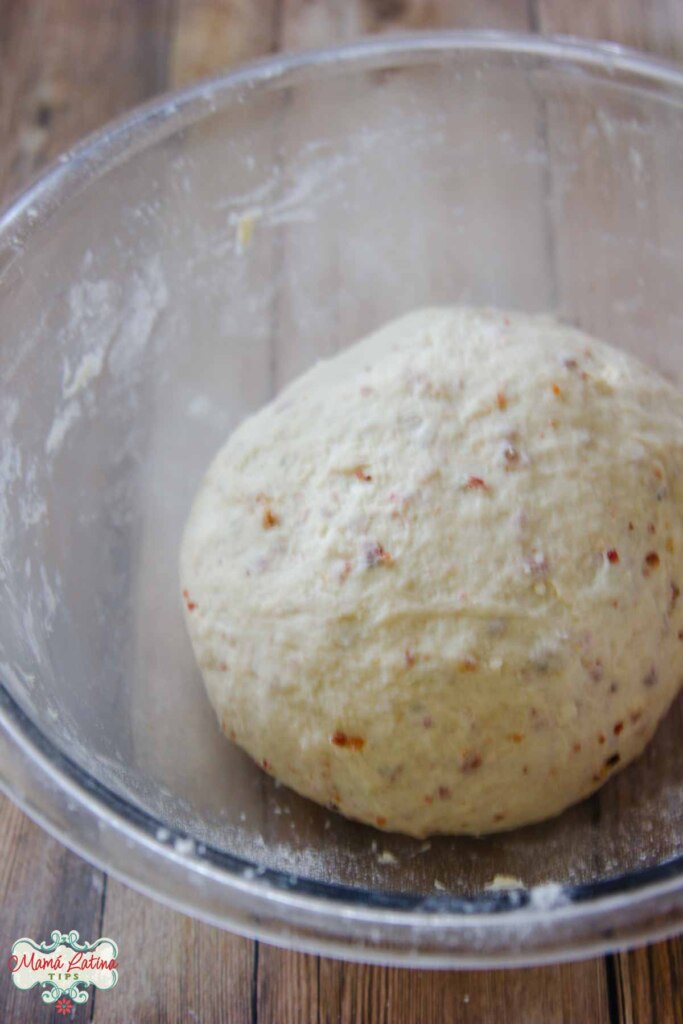
Important note: The weather affects the texture of the tortilla dough. On rainy or humid days, the dough could be wetter than normal; if after kneading for about 5 minutes, you notice that the dough is still wet and very sticky, add a teaspoon of flour and continue kneading.
Repeat if necessary, but be careful not to add too much flour as this could make your tortillas dry and hard when cooked. The dough should feel slightly moist. Try not to add more than three tablespoons.
Conversely, on very hot or dry days, the dough may require more water. Add a teaspoon at a time.
Remember that practice makes perfect; as you make more and more tortillas, you will identify the ideal texture.
Divide and rest the dough
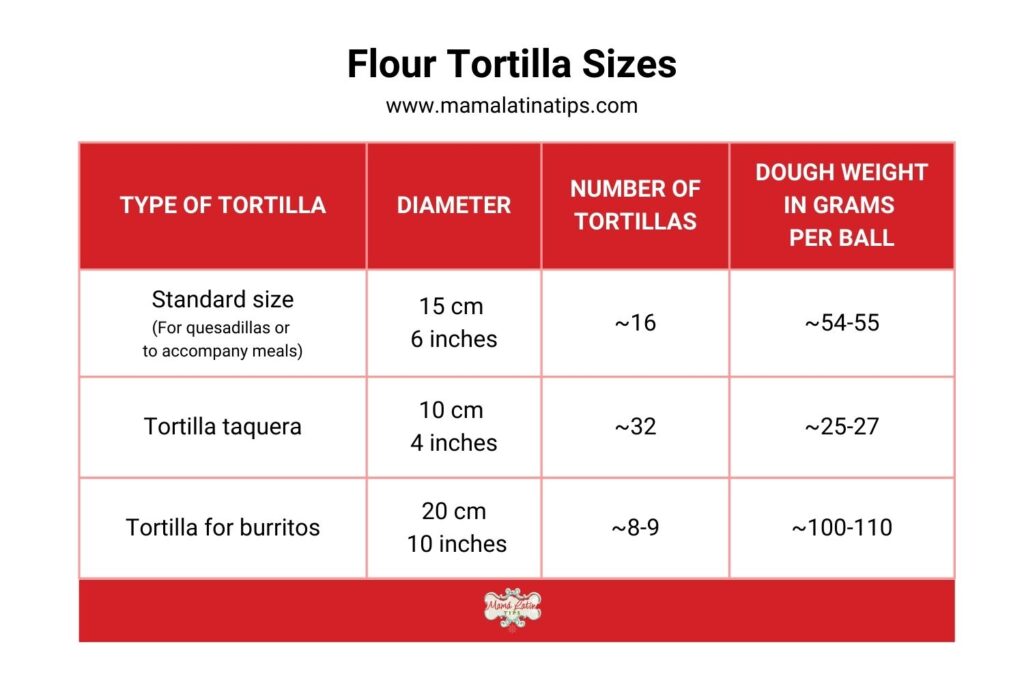
Divide dough into the number of tortillas you want. The nutritional information and photos in this recipe are for regular 6-inch size tortillas, but you can make them smaller 4-inch circles for taco size or larger for burrito size. Review the table below.
I recommend that you use a kitchen scale for consistently even size tortillas. This is the scale that I have, but there are many others at different price points.
If you don't have one, consider buying one, you will use it a lot, I assure you. If you don't have one and want to make the recipe right now, you can divide the dough into equal pieces.
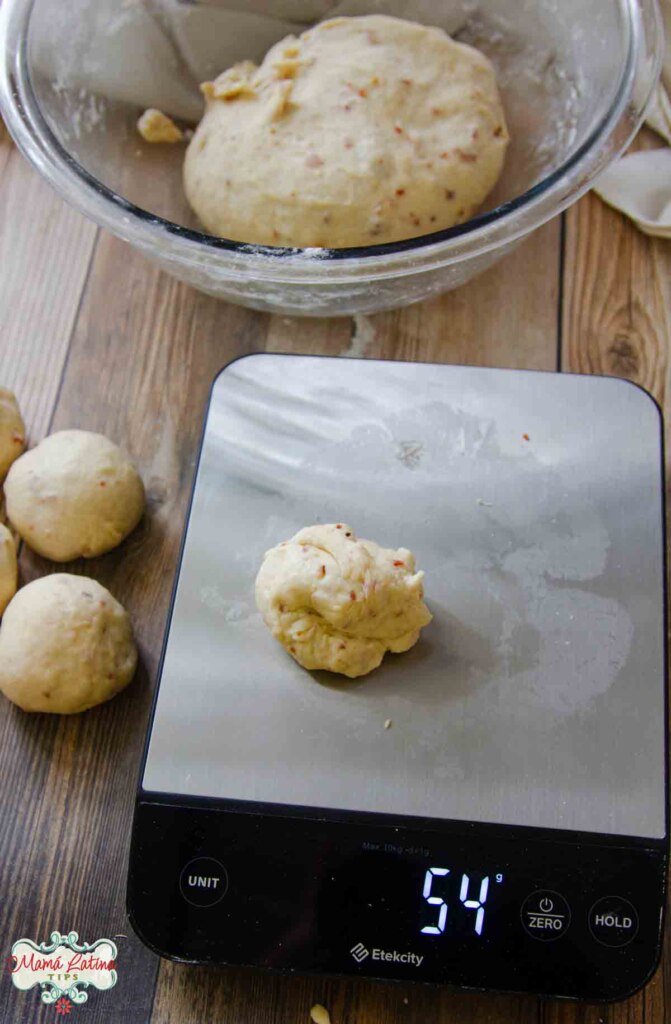
Create balls by rolling them in the palm of your hand or on your work surface, then place them on a lightly floured surface. Sometimes, I use a cutting board, so I can move them if needed. Cover them and let the dough rest for 30 minutes.
This rest time is important because it will allow the gluten that gives elasticity and consistency to the dough to develop. It will also be easier to form the tortillas.
Shape the tortillas
On a lightly floured work surface place one of the balls, please make sure the remaining balls of dough are covered so they don't dry out.
Then with the rolling pin, roll out a tortilla from top to bottom, exerting a little pressure, then rotate it a quarter turn and roll it again from top to bottom. Now flip it over and repeat.
When you flip the tortilla, the flour on the surface will help it not stick to the rolling pin. Try not to add more flour, if you add too much, the tortilla will have a dry texture.
Continue rolling from top to bottom and rotating or flipping it until you achieve the desired thickness and diameter. Repeat.
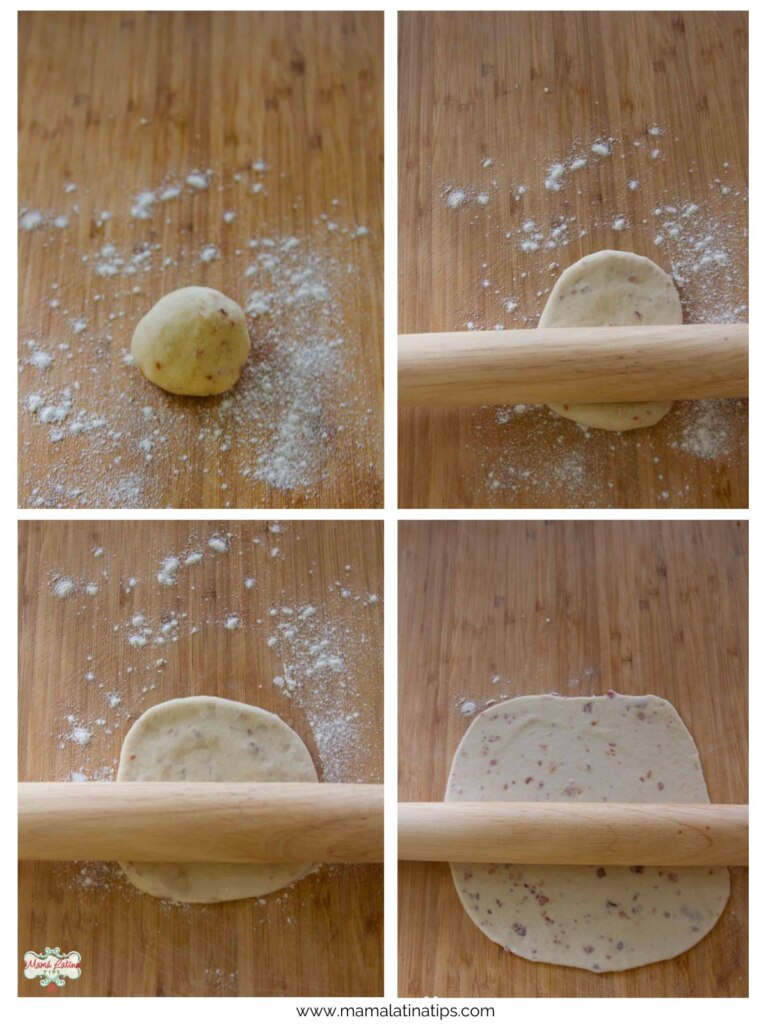
Important Note: Roll out the tortilla to about 2 centimeters (about 1 inch) larger than you want at the end as the tortilla shrinks as it cooks.
I recommend that you roll out only as many as the space in your kitchen allows. You don't want to stack them one on top of the other, since they will stick together and you will have to roll them out again.
I usually roll out three at a time and then, while I'm waiting for one to cook, I roll out the next.
Note: Don't expect tortillas to be perfectly round on the first try. That takes practice. But no matter their shape, they will taste just as good.
Cook the Tortillas
Heat the comal over medium-high heat and place the first tortilla on it. In my experience, the first tortilla rarely turns out perfectly; it is the test to see if the temperature is appropriate.
Tip: Cooking time will vary depending on where you cook them. Cast iron comales or skillets tend to maintain the heat level; other types of skillets will need regular temperature adjustments as the tortillas cook.
When you notice that the surface of the tortillas has changed from a whitish tone to a yellowish tone, bubbles begin to form, and a few brown spots have developed, flip the tortilla. This will take, depending on your stove and comal, between 45-55 seconds.
Wait another 40-45 seconds to cook the other side. Flip again and cook for 10-25 seconds. In this second flip, you will see some of the tortillas puff up.
Remove and wrap tortillas in a kitchen towel or tortillero to keep them warm.
Repeat until you finish all of them. And enjoy!
FAQ
Are tortillas always made of flour?
No, actually, corn tortillas are more common in Mexican cuisine. Traditional flour tortillas are sometimes preferred for quesadillas and burritos, of course!
Can I make homemade flour tortillas without baking powder?
Absolutely! This recipe doesn't use it and the texture is soft and pliable.
Homemade Bacon Fat Flour Tortillas
Ingredients
- 4 cups of all purpose flour approx. 500 gm
- ⅓ cup bacon fat* 60 gm
- 1 teaspoon table salt or 1 1/2 teaspoons of kosher salt
- 1 ¼ cup boiling water
- 3-4 slices of bacon finely chopped
Utensilios
- Large mixing bowl
- Kitchen scale or measuring cups
- Rolling pin, this is my favorite
- Cast-iron griddle or comal or a large skillet
- Tortillero or kitchen towel
Instructions
Prepare the Bacon
- You will need 3-4 fried slices for this recipe, and with the ones you have left over, you can prepare this delicious recipe which I made on the shows as well Chicken Salad with Bacon and Macadamias.
- Chop the slices of bacon as finely as possible; by doing this, the flavor will be even throughout the dough and will also help you roll out the tortilla.
- If the bacon pieces are too large, they could affect the tortilla’s thickness or break it when you form it. Set aside.
Prepare the dough
- In a large bowl, combine flour, bacon fat (either firm if you’ve been storing it or liquid if you’ve just fried the bacon), salt, and boiling water.
- Stir with a wooden spoon first, remember that the water is very hot, until the bacon fat has either melted or integrated.
- You can also use a stand mixer to make the dough if you have one. Please use the dough hook.
- Add the chopped bacon, and with one hand, continue kneading until you get a slightly moist and elastic ball of dough that easily comes off your hand. This will take approximately 8 minutes.
- Important note: The weather affects the texture of the tortilla dough. On rainy or humid days, the dough could be wetter than normal; if after kneading for about 5 minutes, you notice that the dough is still wet and very sticky, add a teaspoon of flour and continue kneading.
- Repeat if necessary, but be careful not to add too much flour as this could make your tortillas dry and hard when cooked. The dough should feel slightly moist. Try not to add more than three tablespoons.
- Conversely, on very hot or dry days, the dough may require more water. Add a teaspoon at a time.
- Remember that practice makes perfect; as you make more and more tortillas, you will identify the ideal texture.
Divide and rest the dough
- Divide dough into the number of tortillas you want. The nutritional information and photos in this recipe are for regular 6-inch size tortillas, but you can make them smaller 4-inch circles for taco size or larger for burrito size. Review the table above in the blog post.
- I recommend that you use a kitchen scale for consistently even size tortillas. This is the scale that I have, but there are many others at different price points.
- If you don’t have one, consider buying one, you will use it a lot, I assure you. If you don’t have one and want to make the recipe right now, you can divide the dough into equal pieces.
- Create balls by rolling them in the palm of your hand or on your work surface, then place them on a lightly floured surface. Sometimes, I use a cutting board, so I can move them if needed. Cover them and let the dough rest for 30 minutes.
- This rest time is important because it will allow the gluten that gives elasticity and consistency to the dough to develop. It will also be easier to form the tortillas.
Shape the tortillas
- On a lightly floured work surface place one of the balls, please make sure the remaining balls of dough are covered so they don’t dry out.
- Then with the rolling pin, roll out a tortilla from top to bottom, exerting a little pressure, then rotate it a quarter turn and roll it again from top to bottom. Now flip it over and repeat.
- When you flip the tortilla, the flour on the surface will help it not stick to the rolling pin. Try not to add more flour, if you add too much, the tortilla will have a dry texture.
- Continue rolling from top to bottom and rotating or flipping it until you achieve the desired thickness and diameter. Repeat.
- I recommend that you roll out only as many as the space in your kitchen allows. You don’t want to stack them one on top of the other, since they will stick together and you will have to roll them out again.
- I usually roll out three at a time and then, while I’m waiting for one to cook, I roll out the next.
Cook the Tortillas
- Heat the comal over medium-high heat and place the first tortilla on it. In my experience, the first tortilla rarely turns out perfectly; it is the test to see if the temperature is appropriate.
- When you notice that the surface of the tortillas has changed from a whitish tone to a yellowish tone, bubbles begin to form, and a few brown spots have developed, flip the tortilla. This will take, depending on your stove and comal, between 45-55 seconds.
- Wait another 40-45 seconds to cook the other side. Flip again and cook for 10-25 seconds. In this second flip, you will see some of the tortillas puff up.
- Remove and wrap tortillas in a kitchen towel or tortillero to keep them warm. Repeat until you finish all of them. And enjoy!
Nutrition
Notes
Did you make this recipe?
Tag @mamalatina on Instagram and hashtag it #mamalatinatips
- How to Prepare Corn Husks for Tamales: Step-by-Step Guide - November 29, 2025
- Mexican Chorizo and Potatoes (Papas con Chorizo) – Easy Family Recipe - November 29, 2025
- Traditional Guava Atole Recipe – Smooth and Creamy - November 14, 2025
