With as many holidays as we like to celebrate each year, I was looking to simplify how we remember each. A good friend of mine had something very sweet which involved changing out a small wooden figurine for each holiday.
In partnership with Lowe's
So when I was challenged by the good folks at Lowe's to come up with a small woodworking project, her wooden holiday board was in the back of my mind.
Now my project turned out quite different from hers, because when I went looking for materials, I stumbled across some fantastic new things, and that got the ideas flowing.
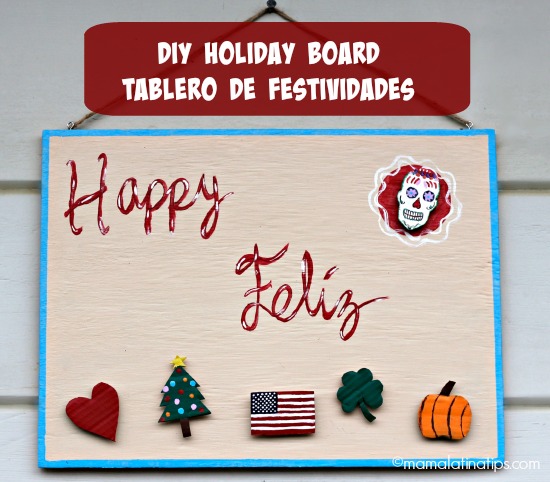
I like this little project because it's incredibly easy to make; it helps reduce clutter in the house (I only need one for all the holidays); it's completely customizable to fit any family's needs; it can be expanded easily to add new holidays anytime; it's bilingual; and, in the end, it is just plain fun! I hang it outside my front door to remind all who enter what we are celebrating.
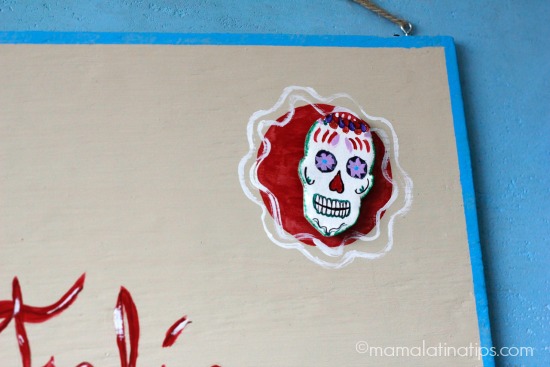
The photo above shows a few of the holidays we celebrate including Valentine's Day, Christmas, 4th of July, St Patrick's Day, Day of the Dead, and Halloween.
But we have more icons to add to it, including Three Kings Day, Candlemas, St Urho's Day (that's a faux Finnish holiday), Easter and Mexican Independence Day, just to name a few.
As each holiday approaches, you just place the appropriate image in the red circle. This board shows the icon for Day of the Dead as an example. The secret to it all is magnetic primer.
Each holiday icon has a magnet attached to the back and the board has been painted with several layers of magnetic primer paint and then a final layer of finish paint. Make sure to continue reading to get a few tips from my experience with the magnetic primer and how to complete this simple project.
Materials
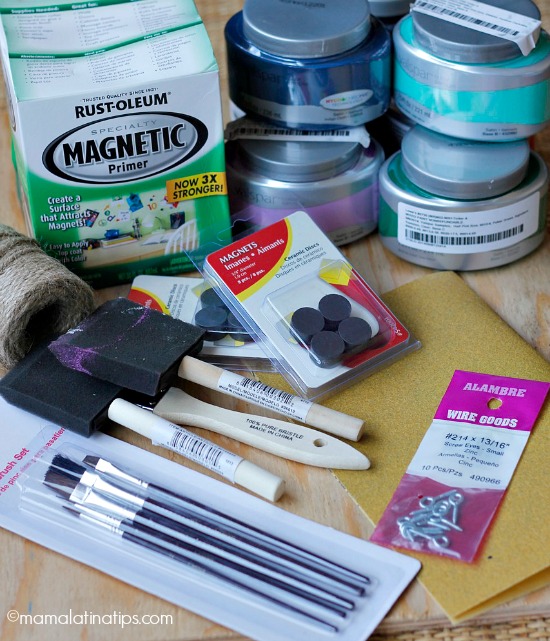
- Piece of wood in the size of your choice. I chose a fairly thin piece so it wouldn't be too heavy up on my wall.
- Rust-oleum magnetic primer
- 3/4 inch ceramic disc magnets
- Valspar sample paint in different colors, depending on the holidays you plan to feature
- Various sizes of paint brushes
- 1-2 foam brushes – I used a Project Source Synthetic paint brush
- Twine
- Sandpaper
- Small screw eyes #214 x 13/16″
- Cardboard
Process
Cut the wood to the size of your choice.
Sand the wood if needed.
Shake Rust-oleum primer very well (I would recommend asking the folks at Lowe's to shake it in their paint department to help get you started), you will need to stir it very well and it will take some time. All the heavy metal tends to settle to the bottom, so will you need to stir it until it is smooth. This is an oil-based primer, so please cover your work area well and choose your clothing accordingly.
Cover board with Rust-oleum magnetic primer using foam brushes, (you most likely will throw them in the trash after you are done). You will need to stir it between coats and you will need to add more coats than the product says. I added 8 layers of primer. Let it dry very well between layers. For me, it dried quickly.
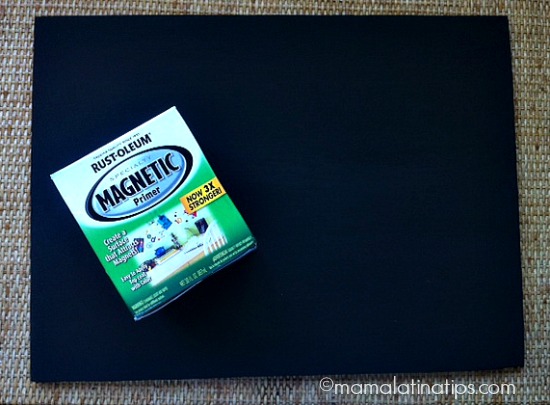
Check to see if the magnetic effects will be sufficient for your needs, then paint a final coat over the magnetic paint in the color you choose and let it dry.
Meanwhile, cut the Holiday figures you like out of cardboard or very thin, light wood. I used templates I found on the internet. Paint them and let them dry.
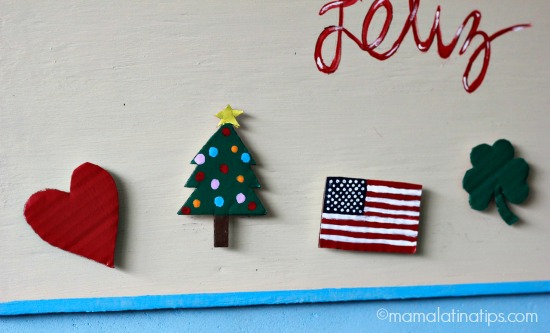
With a thin brush paint the “Happy” and “Feliz” (if you would like to make it bilingual) and paint a circle in the top right corner, where the figure for the current celebration with live. I also added a frame with my favorite blue color.
Take a couple of eye-hooks and screw them into the top of the board. Use twine for hanging.
That's it!
Want greater small project ideas? Check out Lowe’s on Pinterest, Lowe’s on Instagram, or the Lowe’s Creative Ideas website they are all loaded with clever ideas to inspire you.
Enjoy!

- Easy Mexican Flan Recipe (Crème Caramel) - February 26, 2024
- Easy Homemade Flour Tortilla Recipe - January 25, 2024
- 50+ Mexican Side Dishes and Drinks to Serve with Tamales - December 8, 2023